Floor Gymnastics: Definition, History, Types, Elements, Purpose, Benefits, Rules
Floor gymnastics is a branch of gymnastics.
As the name suggests, this exercise is done on the floor, and most of the movements require a mat as an aid.
Which aims to reduce the risk of injury or accident. When doing various movements that almost all of them are in contact with the floor.
Table of contents
Gymnastics
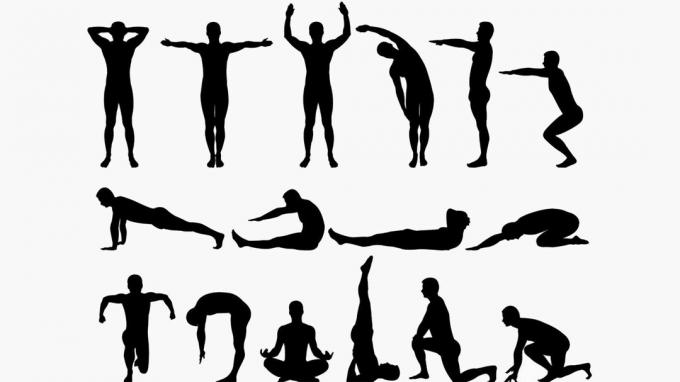
In general, in official matches, floor exercises are carried out on a floor that has a size of 12×12.
Indonesian gymnastics organizations are accommodated in an organization called the Indonesian Gymnastics Association or abbreviated as Persani.
The organization was formed on July 14, 1963 under the name PERSANI (Indonesian Gymnastics Association). At the initiative of sports figures throughout Indonesia who handle and have expertise in the sport of gymnastics.
History
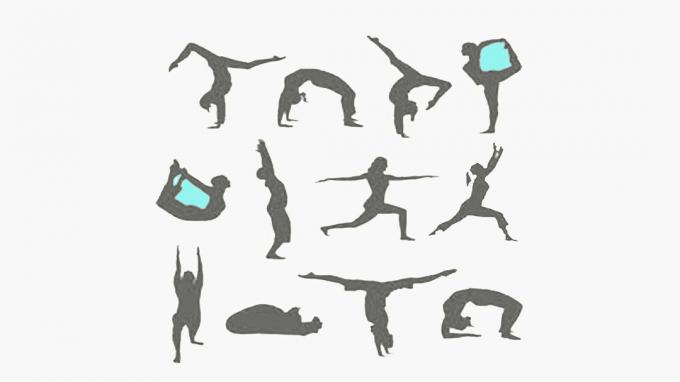
Gymnastics began to be known in Indonesia around 1912, precisely when the Dutch colonial period was in progress.
The inclusion of this gymnastics together with the determination of physical education as one of the compulsory subjects in schools.
Because, gymnastics is a part of physical education, so by itself gymnastics is also automatically taught in schools.
Gymnastics that was first introduced at that time was the German version of gymnastics. This one gymnastics emphasizes the possibility of various movements that are rich in educational tools.
Then in 1916, the system was replaced with a Swedish system which emphasized the benefits of motion.
This system was created and carried out by a health officer from the Royal Dutch Navy named Dr. H. F. Minkema.
Through this Minkema, gymnastics in Indonesia began to spread to various regions. When in 1918 Minkema then opened a Swedish gymnastics course which took place in the city of Malang. Which is intended for soldiers and teachers.
However, the beginning of the spread of this gymnastics is believed to have come from Bandung.
Because, the first school related to gymnastics was founded in the city of Bandung in 1922 at the time of the opening of MGSS (Militaire Gymnastiek en Sporschool).
Those who have graduated from the school will later become Swedish gymnastics instructors in several schools.
Seeing the rapid growth of good gymnastics. Then MGSS started to open branches in several other city areas, such as:
- Bogor
- Poor
- Surakarta
- Field
- Probolinggo.
The entry of the Japanese state to Indonesia in 1942, was the end of this gymnastics sport. Because Japan prohibits all forms of gymnastics in schools and in the community. And also replace it with “Taiso”.
Taiso is a kind of morning gymnastics in the form of calisthenics and at that time it was mandatory to do it in schools before lessons began. Taiso is accompanied by radio music that is broadcast simultaneously.
Before making a move taiso, students are required to pay respects to the Emperor of Japan.
By following the signal that is echoed, which reads “sei kei rei”, and automatically all students have to bow deeply. And facing north (Tokyo) as where Emperor Tenno Heika is located.
After doing the gymnastics, the students are also required to pay homage to the emperor of Japan.
Popularity time “Taiso” didn't last long. Because many Indonesian people are against the existence of Taiso.
With so many rejections, finally the gymnastics taught in several schools returned to the gymnastics that was used during the Dutch colonial period.
With the increasing popularity of gymnastics, an organization was established with the aim of nurturing talented gymnastics athletes.
The organization was formed on July 14, 1963 and was named PERSANI (Indonesian Gymnastics Association). At the initiative of several sports figures throughout Indonesia who also handle and have expertise in the sport of gymnastics.
With the organization first chaired by R. Suhadi.
Then, it wasn't until 1964 that Indonesia first participated in an international floor gymnastics competition at GANEFO I (Games of the New Emerging Forces). And at that time, Indonesia became the host.
Countries that participated in the gymnastics branch included China, Russia, Korea, Egypt, and Indonesia.
The other gymnastics branch that was also contested was artistic gymnastics.
That's the early history of the development of gymnastics in Indonesia until now.
And since the Ganefo incident, artistic gymnastics has also become widely known in the archipelago. So that in 1969, the gymnastics was competed for the first time at PON VII in Surabaya.
Types of Floor Gymnastics
There are many types of floor gymnastics with different levels of difficulty. In fact, it takes years of practice to do so.
Here are some types of floor exercises that will be discussed by yuksinau.id, including the following:
1. Affectionate attitude
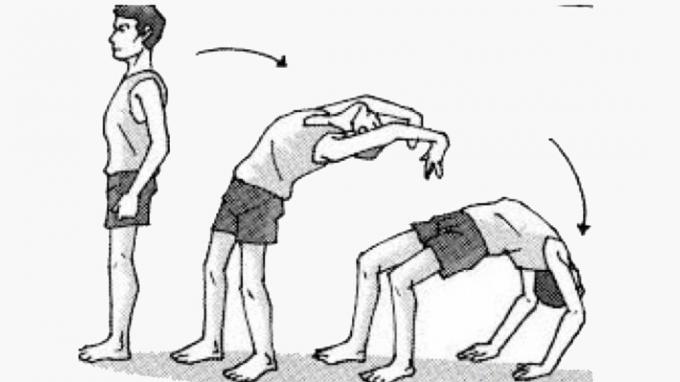
Kayang attitude is one of the movements of floor gymnastics with the position of both hands and feet resting on the mat with the body position upside down. Then stretch and also the pelvis and abdomen are lifted up.
Benefits and goals of this Kayang is to increase the flexibility of the body. Especially in the abdominal muscles, legs, shoulders, hands and waist.
There are two different techniques in doing the kayaking attitude, namely the sleep prefix technique and the standing prefix technique.
Here are the steps in performing the Kayang movement using the standing prefix:
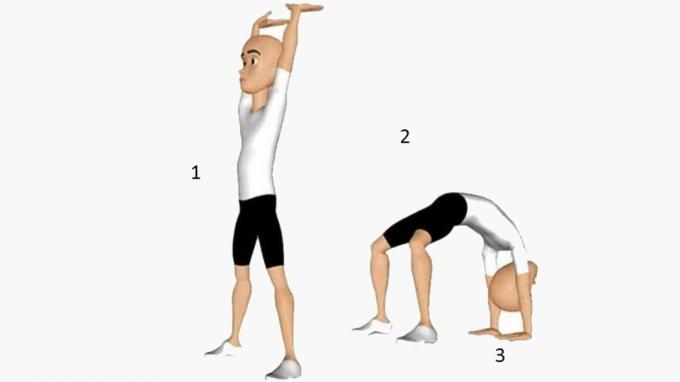
- Take an upright stance with your legs slightly apart.
- The position of each hand is beside the foot.
- Movement of the hands simultaneously or with one hand swing it back. The head is tilted and the body bounces backwards. Make sure that the position of your palms touches or lands on the mat in the correct and good position.
- For those of you who are beginners, you can use the wall as a support or you can ask friends for help. To help hold on to the stomach.
There are steps to perform the Kayang movement using the prefix lying down:
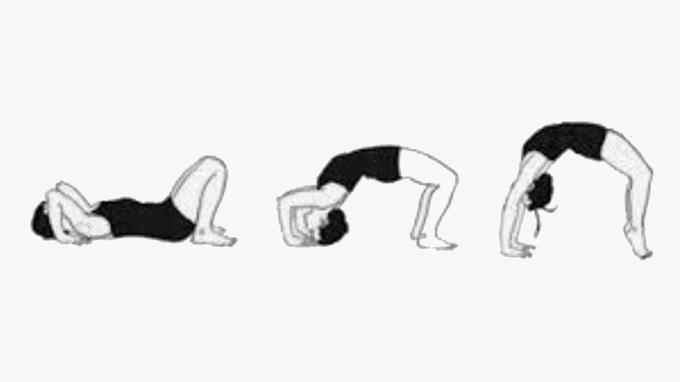
- Start by lying down on the floor or mat.
- Bend both knees, then bring the heels together at the hips.
- Bend your elbows, followed by your palms resting on the mat and placing your thumbs next to your ears.
- Perform the movement of the body lifted slowly upwards, then followed by encouragement from both hands and legs straight.
- Finally, do it by moving your head in between your hands.
Ways to provide kayaking assistance:
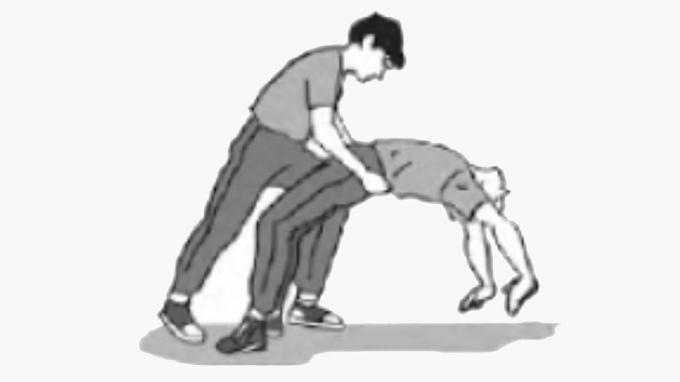
- The friend who will help stand next to the person who will do the kayaking. Then wrap your arms around your waist and slowly lower them.
- Assistance can be done by 2 people with each person standing on the side. And holding each other and the handle is placed right at the waist.
Some mistakes when doing rich attitude:
- Not doing enough warm-up or stretching beforehand. So often you will experience pain to muscle injury because the muscles are pulled after doing the kayaking movement.
- Bent elbows, due to stiffness in the shoulders and joints.
- Lack of balance.
- The position of the body is less arched because the back is less flexible and also the stiffness in the abdominal muscles.
- Try to position the head should be right and do not look up too much.
2. Candle Attitude
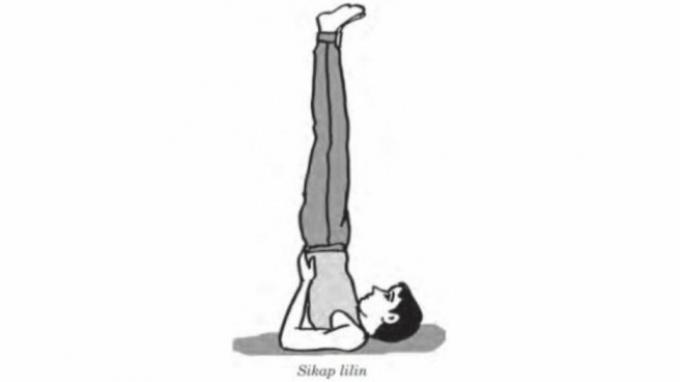
The candle stance is one of the floor gymnastics movements that are usually performed on a mat. With the upright legs on top while the head is down so that it will be shaped like a candle.
The purpose of the candle stance is to train the body's balance and keep the body healthy. Not only that, the candle stance is a ground floor exercise for other categories of gymnastics.
To be able to do this movement requires regular practice so that the results obtained are maximum. And for those of you who are still beginners, you can ask friends for help.
But keep in mind, before doing this movement, it must be confirmed first if you have warmed up first. This is to prevent accidents or injuries.
Here are some steps to do the right candle stance:
- The first step is to sleep on your back with your legs straight. While both straight hands are on the right and left sides of the body.
- View straight up. After that lift both legs and hips assisted by using both hands to push the legs up.
Feet should be close together and pushed using hands that are shaped like elbows. Make sure your legs and hips are straight, then adjust and maintain balance. - While making a landing or something simple lowering the leg should be done slowly. This is useful to avoid injury.
Here are some ways to provide candle stance relief:
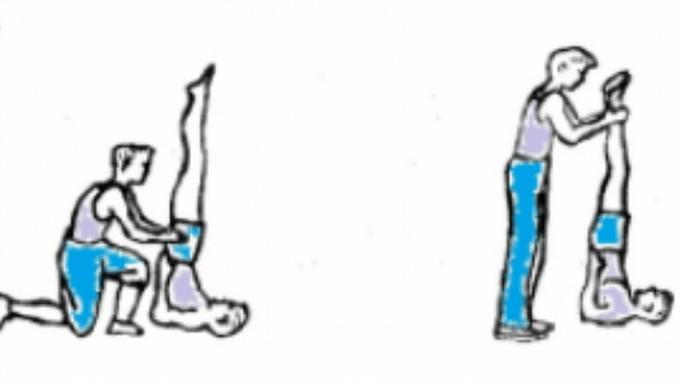
- The person who will help his position is on the side or it can be in front of him to further help lift his friend's legs and hold them.
- Grasp the ankles while straightening the legs above.
Mistakes that often occur when doing a candle stance:
- The waist is supported only by using the thumb.
- Both legs tend to lean back, so it's hard to support and can't hold on for a long time.
- Both legs tend to lean forward.
- The placement of the elbows is too far from the proper width of the body.
- No or less focus on the shoulders.
3. Handstand
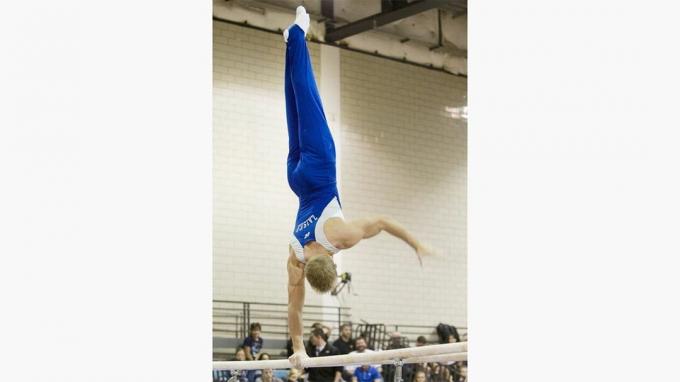
Handstand is a standing position by using both hands to support the whole body. And the hands are down and the legs are straight up.
This movement is included in the level of floor gymnastics which is quite difficult to do because it will require high balance.
Here are some steps for doing a handstand:
- The first step that must be done is to stand straight with both hands straight at the side of the body.
- Next move slowly one leg to be more advanced than the other leg.
- Bend over using both palms resting on the mat or the floor.
- Then slowly lift the legs one by one.
- Push your buttocks as high as you can.
- Bend the leg forward while the back leg is straightened.
- The final position is the body in an inverted position by 180 degrees. And in balance with both legs tight and straight.
- For those of you who are beginners. If you are not experienced in doing so, you can use a wall or wall as a backrest or support for both legs.
Here are some ways to provide handstand assistance:
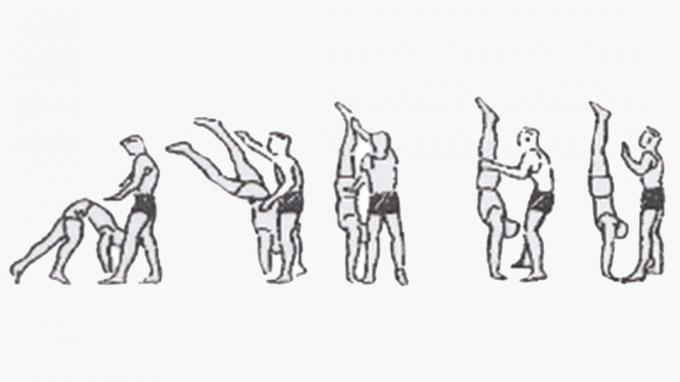
- Providing assistance in handstand movements is to help support the pelvis, back of the thighs, and both ankles.
- For those of you who are not strong enough in the shoulders, arms, and hands if you want to fall, continue with the front roll in order to reduce the risk of injury.
4. Headstand
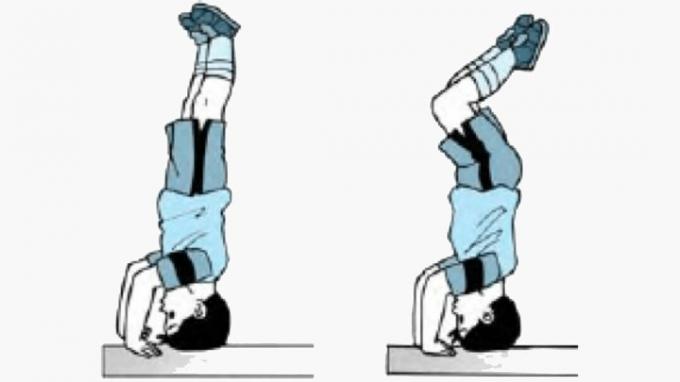
The headstand is one of the floor exercises in which the head is standing down. And the body is supported by using both hands that form a triangle.
The headstand movement is a derivative of the handstand movement. Which also requires higher concentration and coordination. So it has a higher level of difficulty than a handstand.
Here are some steps for doing a headstand:
- The first step that must be done is to bend the body with the forehead and both hands resting on the floor.
- Make sure your forehead and hands will form an equilateral triangle.
- Place the head right in front by forming a triangle.
- Walk slowly forward.
- When the spine is in a straight position, strengthen the abdominal muscles, inhale, and lift one leg straight up, then the other leg up.
Here are some ways to provide headstand assistance:
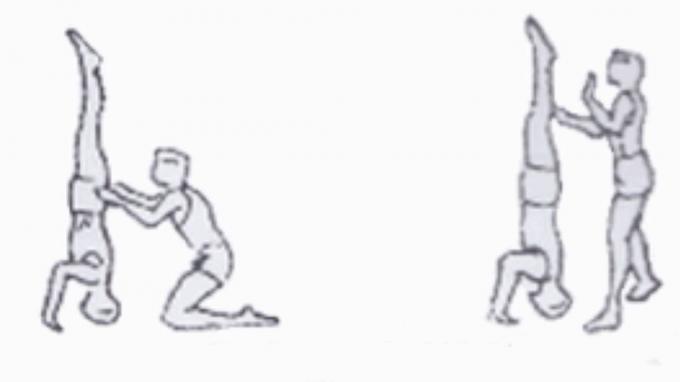
- Helps to lift as well as pull the pelvis.
- Grasping and holding both legs, grasp at the ends of the ankles and the backs of the thighs or hips.
Mistakes that often occur when doing a headstand:
- The placement or position of the hands and head do not form the points of an equilateral triangle.
- Stiffness in the neck, shoulder joints, abdomen, waist, thighs, neck muscles, shoulder joints, abdomen, waist, and thighs are less strong
- Wrong hand attitude or position, namely the fingers are not facing forward.
5. Front Roll (Forward Roll)
Rolling forward or what we know as rolling forward is rolling forward with the back of the body (neck, back, waist and back of the pelvis).
Technically, the front roll can be done in 2 ways. Namely by using the standing prefix technique and also the squat prefix technique.
Here are some steps for doing a front roll using the squat prefix:
- The first step that must be done is squatting with both hands spread shoulder-width apart and palms placed on the mat.
- Then straighten your legs and bend your elbows a little.
- Move your head toward your chin until it touches your chest.
- Then roll forward.
- Followed by bending both knees, pull your chin and knees in front of your chest with your hands embracing your knees.
- The final position of the front roll or front roll is to squat and then stand up straight
Here are some steps for doing a front roll using a standing prefix:
- First, raise both hands forward and bend down, then place your palms on the mat.
- Fold your elbows slightly to the sides, then put your head between your hands.
- Touch your shoulders to the mat and roll forward.
- Bend both knees, then pull your chin and knees to your chest with your hands embracing your knees
Here are a few ways to provide assistance with a forward roll:
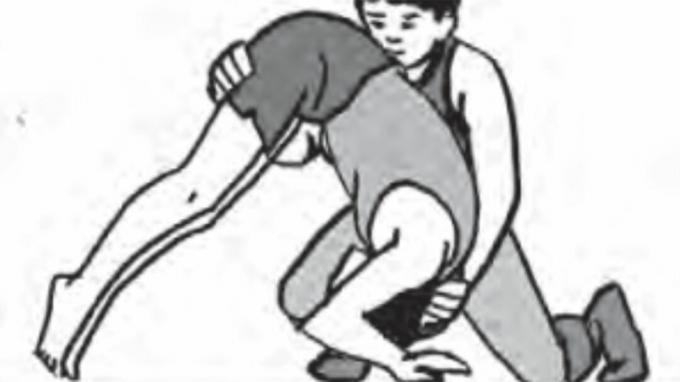
- Hold the back of the head and push down to both knees.
- Push back when sitting down.
- Help by bending the head and placing it on the floor between the hands.
Errors that often occur when doing a front roll:
- The hands that are resting cannot be opened too wide or too narrow, too far or too close to the toes.
- The hand support is lacking or not strong, so it will make the body balance less than perfect and can cause the body to fall to the side.
- The shoulders are not positioned on the mat when the arms are bent.
- When rolling forward the hand does not resist.
6. Back Roll (Back Roll)
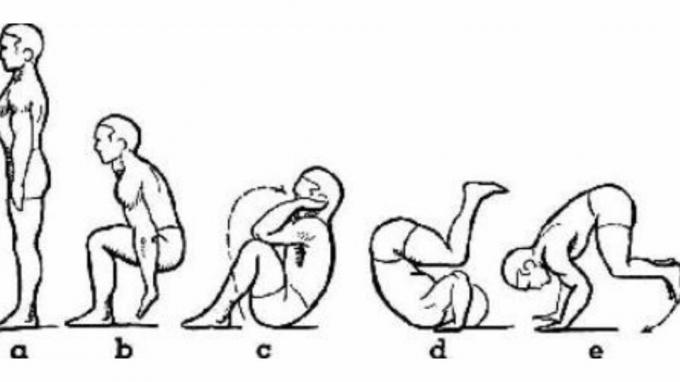
Back roll is a style of floor exercise in which the body rolls towards the back of the body. By going through the back of the body, starting from the pelvis, the back is the waist, back, and nape.
Here are some steps to perform a back roll:
- The starting position is in a squatting position, feet together, and heels raised.
- The head is lowered and the chin is close to the chest.
- The hands are next to the ears and the palms are facing upwards.
- Drop the buttocks towards the back, but the body remains round.
- When the back touches the mat, the knees are immediately pulled to the back of the head.
- When the two toes touch the mat behind the head, the palms Press down on the mat until your arms are straight and your head is raised.
- Take a squat stance, straight ahead at shoulder level, then stand up.
Here are a few ways to provide assistance with the back roll:
- Supports and pushes the waist towards the back roll and brings it towards the bolster.
- Assists with elevating the pelvis as well as bringing it toward a bolster.
Errors that often occur when doing a back roll:
- Laying hands too far to the back, so that at the time of repulsion, the body and hands are not strong.
- Body balance is lacking or not good when rolling backwards. This can happen due to a less rounded posture
- The position when rolling is not perfect. This can happen because the head is turned to the side.
- Balance is not maintained properly because it lands on the knees (should be the soles of the feet).
7. Meroda (Cart Wheel)
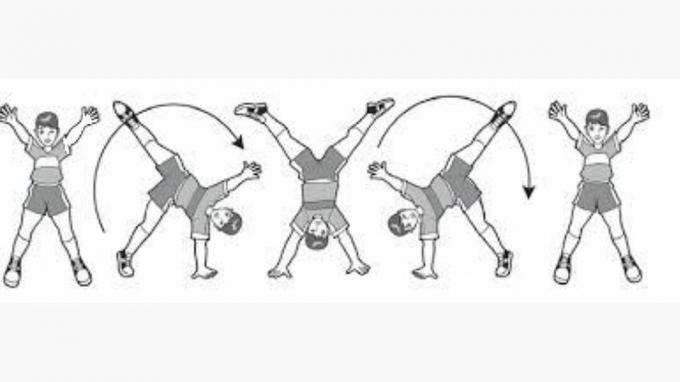
Wheeling is a sideways movement in floor exercise. At the time of resting by using both hands with feet wide apart.
Wheeling can be done by using the prefix to the left or to the right, it's up to you according to what position you think is comfortable. Wheel movement will require good and accurate movement coordination.
Here are some steps for doing the wheeling motion:
- The first step that must be done is to stand straight with both hands straight at the side of the body.
- Then spread your feet shoulder width apart while both hands are straight up and form a V letter.
- Drop your body to the left while placing your left palm on the mat.
- Lift the left leg straight up.
- Next, taurh the right hand next to the left hand.
- Lift the right leg straight up while the left leg also starts to come back down.
- Raise your left hand followed by your left leg.
- Return to starting position while standing straight.
Here are some ways to provide assistance to do cartwheels:
- One friend will provide help by standing behind the person who will do the wheeling movement.
- When the body and also the two legs that do the wheeling are lifted up. Then the friend will quickly hold both sides of his hips
- Followed by doing a sideways wheeling motion. And friends who help keep holding both sides of the hips until both feet support the floor.
Errors that often occur when doing wheeling:
- Striking or throwing feet that are not strong enough.
- The kick or throw of the foot moves forward, which should be upwards.
- Placement of the first hand on the floor too close to the foot of the repulsion.
- The posture is less bouncy.
- Both elbows are bent.
8. Salto (Summersault)
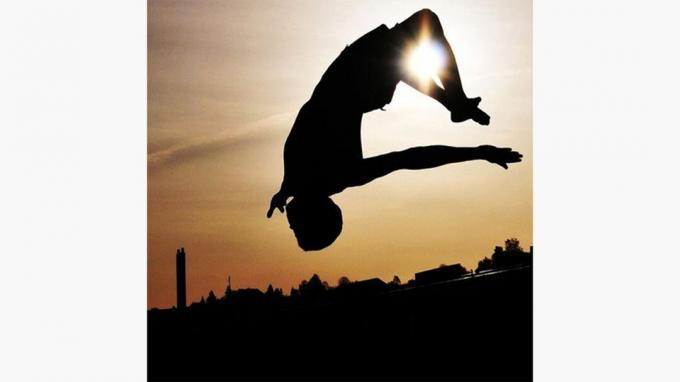
Salto is a rolling movement in the air, somersaults can also be done forwards or backwards.
Perhaps the somersault is one of the most difficult floor exercises. So you have to be trained often to be able to do this movement. Because if you fail to do somersaults it can be fatal.
Before doing somersaults, it's a good idea to warm up one of them by doing a tiger jump.
Here are some ways to give some help with somersaults:
- The first step that must be done is to stand up straight and position both hands straight at the side of the body.
- Then take a few steps, or if necessary, run, before making a strong push.
- Swing your arms down during the push for added thrust.
- While the body is floating in the air, fold your arms towards your knees and then lower your head.
- After the body has rotated 360 degrees, straighten the legs to make the landing.
- And followed by hands raised up.
- The last position is to stand straight again using your hands as a balance.
Mistakes that often occur when doing somersaults:
- When you are doing a push, both legs are not strong enough.
- Both arms are less or not strong enough to swing up.
- Leaps lean forward, not up. This will result in the jump not being able to reach the maximum height. This type of error will often make you land in a sitting position.
- Less circular body position. Because, the knees and hands are not tight, the head is also not lowered.
- At the time of landing the arms do not stretch upwards but swing forward. This of course will reduce the balance.
9. Tiger Jump
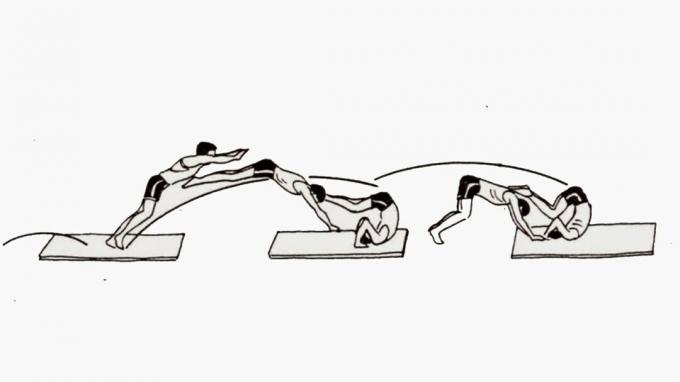
As the name implies, the tiger jump is a jumping movement that is very similar to a tiger when it is about to pounce on its prey.
Technically, the technique commonly used during the tiger jump is more or less the same as the technique used in the forward roll. The only difference is in the beginning.
Here are some ways to provide assistance with the tiger jump:
- The first position that must be done is to stand straight with both hands straight at the side of the body.
- Using the repulsion board, and jump forward with your arms swinging upwards.
- While the body is floating in the air, bend forward and fold your knees in front of your chest.
- Straighten your legs just before landing.
- The last position to do is squat followed by standing.
Mistakes that often occur when doing a tiger jump:
- Less strong jumps.
- Less strong grip.
- The head is used as a support.
- At the time of roll forward the movement is not perfect.
10. Jump Squat
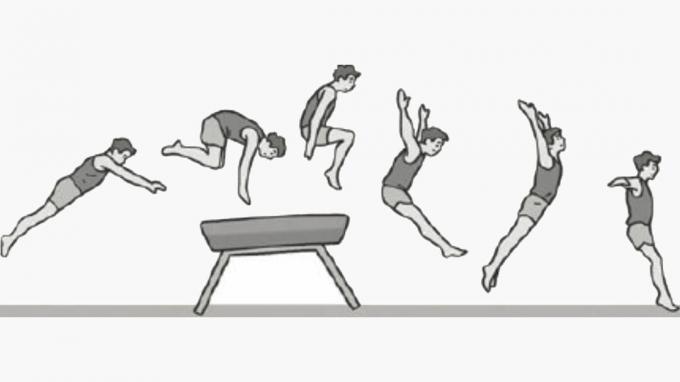
Squat jump is one type of jump that is done by using a jump crate and is done in a squatting position when passing a jump crate.
Here are some steps to do the squat jump:
- The first position that must be done is to stand straight with both hands straight at the side of the body.
- Start running with a body position that tends to lean forward.
- Do a strong push on the repulsion board using both feet.
- Swing your arms forward while keeping your body straight and legs extended.
- Land by using your feet and body towards a squatting position while your arms are stretched upwards.
- The last position that is done is squatting and followed by a standing position.
Errors that often occur when doing squat jumps:
- The start of the run is not fast enough.
- When jumping the repulsion on both feet is not the same.
- When jumping, the legs are not wide open.
- The jump made is not strong enough.
- At the time of landing the feet are not simultaneously and not sequentially.
- Eyes are not focused on the front.
11. Straddle Jump
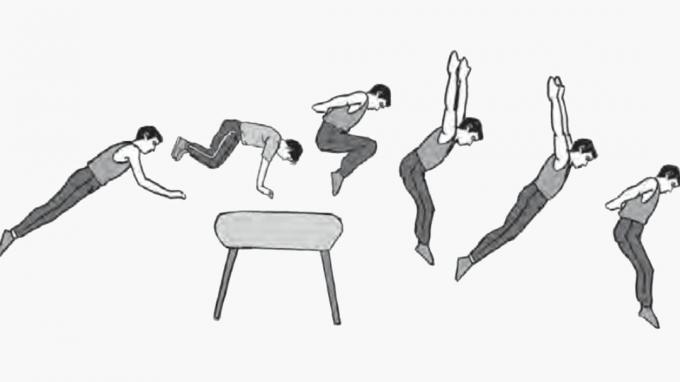
The straddle jump is a type of jump that is usually done by jumping over the crate. And with the position of the legs wide open to the right and also to the left.
To do the straddle jump requires courage so that later things will not happen that is not desirable.
Here are some steps to do the straddle jump. But it would be nice if before doing the straddle jump started with warming up to avoid injury.
- The first movement is to run as fast as possible towards the board with the body leaning forward.
- Both feet resisted on the repulsion board and performed with all their might. Followed by a swing of the arms down and forward, the body is straight and the legs are opened.
- The eyes focus on the jump crate.
- When both hands touch the jump crate, immediately push it away using both hands with all your might. Straight body followed by the position of both arms outstretched.
- Landing is done with the toe position, knees spread and both hands straight up.
Mistakes that often occur when doing a straddle jump:
- Runs that are not so fast or less so that the jumps obtained are less than optimal.
- When doing foot repulsion on the repulsion board, the legs are not lifted high and also the body position is not straight.
- When the hands are resting, the head is tilted too forward so that the arms cannot be aligned with the body position.
- The hips are not lifted high enough to make a straddle stance on the crate.
- When doing a jump, knees in a bent position.
- The head and chest are not raised when the hands touch the jump crate.
- When doing a jump, the arms are not straight.
The following is a list of the types of floor exercises:
- roll forward (forward roll)
- roll back (backward roll)
- tiger jump (tiger sprong)
- elastic (hands stand overslag)
- wheeling
- squat jump
- swivel elastic (round off)
- flex your arms back (flak)
- knee roll balance (squat roll)
- straddle jump
- standing with head (kopstand)
- rich (brug)
- candle attitude
- forward flip (Summer vault)
- back flip (Back Summer vault )
- elastic roll (roll kiep)
- fish jump (snack)
Elements of Floor Gymnastics Movement
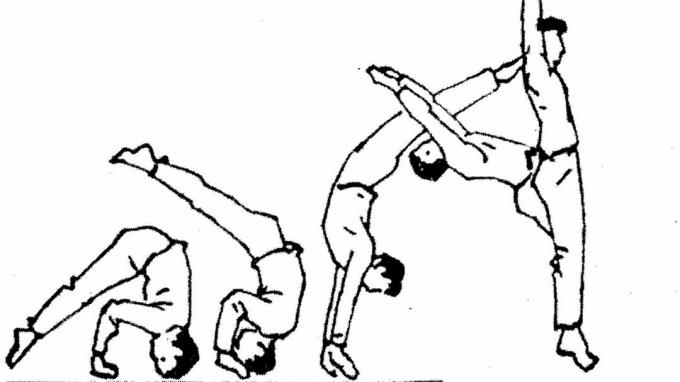
As for the six elements of the floor exercise movement that yuksianu.id has summarized for all of you, come on note the explanation below:
1. Elements of Beauty
Beauty is grown by making a variety of movements used from dance disciplines and acrobatics.
For example with various gestures in ballet dance and also small movements that contain elements of dance.
2. Element of Strength
Strength will of course be the most important element in floor gymnastics. Because some extreme movements can only be done if the athlete is willing and also widens the range of his body's energy. Through basic floor exercises.
3. Elements of Courage
Floor gymnastics and other artistic gymnastics will require its own courage to do it.
Because in this sport the athlete is required to be able to beat his own fear. So that he is able and dares to do extreme movements. And still be able to maintain balance, flexibility and beauty of movement.
4. Elements of Flexibility
A flexible body has high flexibility to perform various types of difficult movements, for example kayaking, somersaults, wheeling, rolls and so on.
Flexibility is also important to create aesthetic movements.
5. Elements of Dexterity
Flexibility of motion at the time of performing the body's performance will indicate perseverance and also the depth of training that has been carried out by the athlete.
In one performance, often the athlete has done this movement repeatedly so that when he does it again, he is no longer awkward and confused.
6. Elements of BalanceWithout a good balance, it will be impossible for the athlete to perform at his best. Instead he will fall before jumping if the athlete's balance cannot be managed properly.
Rules in Floor Gymnastics
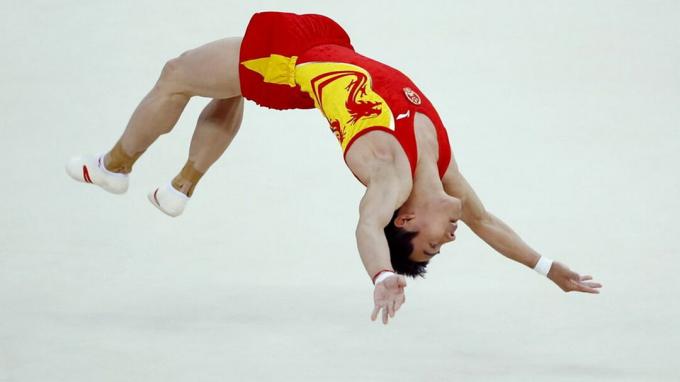
In a floor gymnastics match, the rules that apply are very simple, namely the athlete may not leave the competition arena before his performance is finished.
In other words, the performance can only be displayed and validated in the arena according to the specified time limit.
If, there are parts of the athlete's body (eg legs and arms) that are only slightly out of the arena. Then the referee will give a red flag and the score will be reduced.
Not only that, the score will also decrease. If the athlete is lacking or unable to perform certain movements in the choreography of the motion.
Not only that, even if the athlete is slightly unbalanced. The example is a little wobbly after doing a series of flips, then it will be able to reduce the value or scro.
From all aspects of the motion presented by the floor gymnast athlete in the competition, later the jury will give a value or score.
The athlete who gets the highest score is the athlete who is entitled to the title or win.
Mats used in Floor Gymnastics
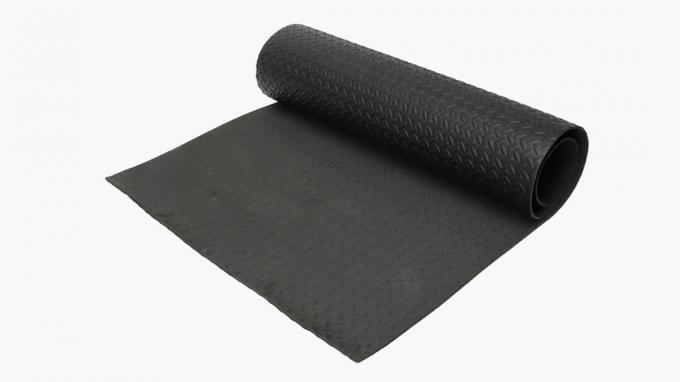
The function of this mat is to protect athletes from unwanted things.
For example, when the athlete is thrown out of the arena. While doing acrobatic somersaults with several flips in the air.
The field for floor exercise itself is an arena with a flat surface made of wood. With a smooth surface but not slippery and has a size of 12 × 12 meters.
Mats will be placed around the field with a width of 1 meter each.
The mattress has been designed in such a way that the surface will be very flat and will seem to blend into the field itself.
Even so, the mat that was installed as a safety floor for the gymnastics court was also not as thick. As well as a soft mat for floor exercises in general.
So, what about the mat used for training? Here's the explanation:
There are several types of mattresses used. But most floor exercises only use a thin mat that has a thickness of about 3-5 cm.
Mats that are too thick will actually interfere with exercise time. Because athletes will find it difficult to regulate their body balance when exercising on a thick mat.
The natural mattress recommended for floor exercise is a sandy surface. Like a beach, or a loose grassy garden.
Destination
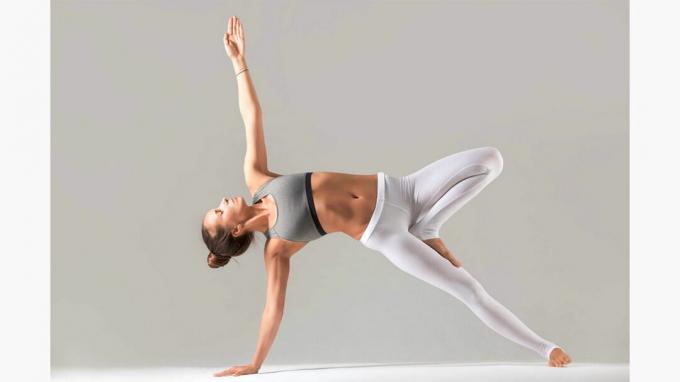
Being a champion or having an athletic and sexy body seems to be one of the goals of someone practicing floor gymnastics.
However, there are other things that are also the goal of this floor exercise. That is a sense of life that can only be obtained when a floor gymnast is successful in transcending the limitations of his body. Such as the fear, as well as the disbelief that the body is capable of doing even the most dangerous things.
In general, the goal of the floor gymnast continuing to exercise is to continually try to widen the range of her own body.
So he can no longer do it. Or no one can do the body movement he has achieved.
Benefits of Floor Gymnastics
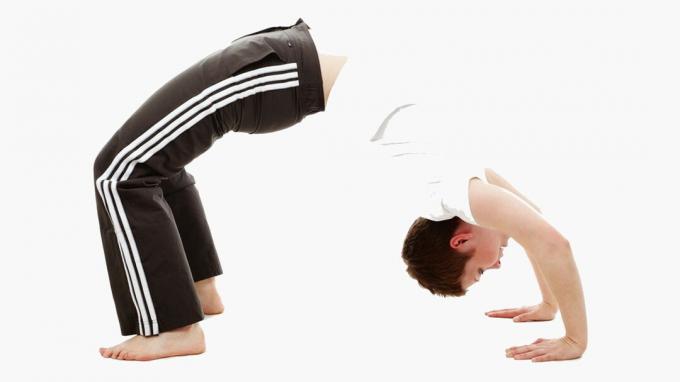
As for some of the benefits of floor exercise that you should know in addition to maintaining health, including the following:
- Better body health
- Improve body shape that is less proportional (shaping a proportional body)
- Reducing weight
- The body will become more flexible
- As a process in the formation of the body (proportional)
- Increase in height
- Helps in bone strengthening and growth
- The process of flexing the shoulder
- As a detox
- Increase self-confidence
- Helps stimulate cell growth
- Train the body to move more agile
- Train your heart health to beat regularly and also strong
- Maintain body fitness and freshness
That's the review about floor exercise that we can give to all of you, hopefully it will be useful.
